- Get link
- X
- Other Apps
Written by: Brandon Molyneaux

I get excited to use BUFKIT when I come across an error where I can't import the data. I wrote a script and wanted to share it with everyone who may have come across this issue.
Please note that if you are not familiar with Python, you may send me an email asking me to type up the scripts for you. Please include the following: your email, all of the stations IACO's, the model runs you want, and the path to your desktop. Please send it to:
I will attempt to respond within 24 hours. If you do not hear from me within 24 hours, please don't hesitate to send me another email as a reminder. If you're worried I'll ask for anything (such as payment), don't - consider it a favor =)
Follow these steps to bypass this issue.
- Download BUFKIT via NWS (you can also directly download it here) and go through the installation process.
- Create a folder on your desktop called BUFKIT.
- Create two sub-folders and name them Data and Archive.
- Make the proper edits (as denoted below).
- Note: Open Notepad and copy/paste the script and make the proper edits.
- Save it as a .py file with the naming convention of your choice. I recommend saving it as {model run}Z_{model}. For example, 18Z_NAM.py
- Optional: Save it as an executable file (see blog post here).
- If BUFKIT isn't open, open it and click "Set Up".
- At the very top, change the first directory to the Data folder (created in step 3) and change the second directory to the Archive folder (created in step 3).
You now need to install Python. It's a simple install - go to https://www.python.org/ and hover over "downloads" and install the most recent version (at the time of writing, 3.6.3). Once it's done downloading, install it into your computer. Be sure to check the box that says "Add Python 3.6 to PATH".

Now that you have Python installed, you'll never need to use Bufget to get the skew-t. Just modify the code below to suit your needs. I've provided a list of links for the GFS, NAM and HRRR below the for your reference.
Note: This is for Python 3.xx.

Now that you have Python installed, you'll never need to use Bufget to get the skew-t. Just modify the code below to suit your needs. I've provided a list of links for the GFS, NAM and HRRR below the for your reference.
Note: This is for Python 3.xx.
import urllib.request
import shutil
import os

os.chdir('C:/Users/Username/Desktop/BUFKIT/Data') #windows
os.chdir('/Users/Username/Desktop/BUFKIT/Data') #mac
#all of your stations should go here
#example ---> 0 : 'klns'
#               1 : 'kabe'
stations = {
    0 : 'kxxx',
    1 : 'kxxx',
    2 : 'kxxx',
    3 : 'kxxx',
    4 : 'kxxx',
   #continue listing stations
}

#Change the variable "url" as needed
#I have provided additional urls as needed.
for i in range(len(stations)):
    url = ftp://ftp.meteo.psu.edu/pub/bufkit/GFS/00/gfs3_' + stations[i] + '.buf'

    with urllib.request.urlopen(url) as response, open('gfs3_' + stations[i] + '.buf', 'wb') as out_file:
        shutil.copyfileobj(response, out_file)
    print('Successfully downloaded ' + stations[i])
#questions? Tweet at me: @WxBDM or send me a DM.
Things to edit:
- The url. I've provided links for you to copy and paste right into the code below.
- The directory (os.chdir). This is the working directory for the script - needless to say, it's a pretty important line of code. You want to change this to lead to your BUFKIT directory. In my case, it would be C:/Users/Brandon/Desktop/BUFKIT.
- Stations. These are the links you would normally copy and paste into Bufget. This is denoted by stations = {...
- The 3rd line from the bottom. You want to change where it says 'gfs3_' to whatever model you have. For example...
- If you want to use the 12z NAM, you want to change 'gfs3_' to 'nam_'.
- If you want to use the 18z NAM, change it from 'gfs3_' to 'namm_'.
- If you want to use 17z HRRR, you want to change 'gfs3_' to 'hrrr_'
Models and times:
GFS:
00z: 'ftp://ftp.meteo.psu.edu/pub/bufkit/GFS/00/gfs3_' + stations[i] + '.buf'
06z: 'ftp://ftp.meteo.psu.edu/pub/bufkit/GFS/06/gfs3_' + stations[i] + '.buf'
12z: 'ftp://ftp.meteo.psu.edu/pub/bufkit/GFS/12/gfs3_' + stations[i] + '.buf'
18z: 'ftp://ftp.meteo.psu.edu/pub/bufkit/GFS/18/gfs3_' + stations[i] + '.buf'
3rd line from bottom:
with urllib.request.urlopen(url) as response, open('gfs3_' + stations[i] + '.buf', 'wb') as out_file:
NAM: **had an issue with Penn State, so I switched to Iowa State.
00/12z: 'http://www.meteor.iastate.edu/~ckarsten/bufkit/data/nam/nam_' + stations[i] + '.buf'
06/18z: 'http://www.meteor.iastate.edu/~ckarsten/bufkit/data/namm/namm_' + stations[i] + '.buf'
3rd line from bottom:
00z/12z NAM
with urllib.request.urlopen(url) as response, open('nam_' + stations[i] + '.buf', 'wb') as out_file:
06z/18z NAM
with urllib.request.urlopen(url) as response, open('nam_' + stations[i] + '.buf', 'wb') as out_file:
00z: 'ftp://ftp.meteo.psu.edu/pub/bufkit/NAMNEST/00/namnest_' + stations[i] + '.buf'
06z: 'ftp://ftp.meteo.psu.edu/pub/bufkit/NAMNEST/06/namnest_' + stations[i] + '.buf'
12z: 'ftp://ftp.meteo.psu.edu/pub/bufkit/NAMNEST/12/namnest_' + stations[i] + '.buf'
18z: 'ftp://ftp.meteo.psu.edu/pub/bufkit/NAMNEST/18/namnest_' + stations[i] + '.buf'
3rd line from bottom:
with urllib.request.urlopen(url) as response, open('namnest_' + stations[i] + '.buf', 'wb') as out_file:
HRRR:
I'm not going to list them all, but you should get the general idea with the ones provided below.
00z: ftp://ftp.meteo.psu.edu/pub/bufkit/HRRR/00/hrrr_' + stations[i] + '.buf'
01z: ftp://ftp.meteo.psu.edu/pub/bufkit/HRRR/01/hrrr_' + stations[i] + '.buf'
02z: ftp://ftp.meteo.psu.edu/pub/bufkit/HRRR/02/hrrr_' + stations[i] + '.buf'
...
3rd line from bottom:
RAP:
Same as the HRRR.
09z: 'ftp://ftp.meteo.psu.edu/pub/bufkit/RAP/09/rap_' + stations[i] + '.buf'
10z: 'ftp://ftp.meteo.psu.edu/pub/bufkit/RAP/10/rap_' + stations[i] + '.buf'
SREF:
03z: 'ftp://ftp.meteo.psu.edu/pub/bufkit/SREF/03/sref_' + stations[i] + '.buz'
09z: 'ftp://ftp.meteo.psu.edu/pub/bufkit/SREF/09/sref_' + stations[i] + '.buz'
15z: 'ftp://ftp.meteo.psu.edu/pub/bufkit/SREF/15/sref_' + stations[i] + '.buz'
21z: 'ftp://ftp.meteo.psu.edu/pub/bufkit/SREF/21/sref_' + stations[i] + '.buz'
3rd line from bottom:
===============================
If you do NOT have a compiler, please read below to be able to execute the script.
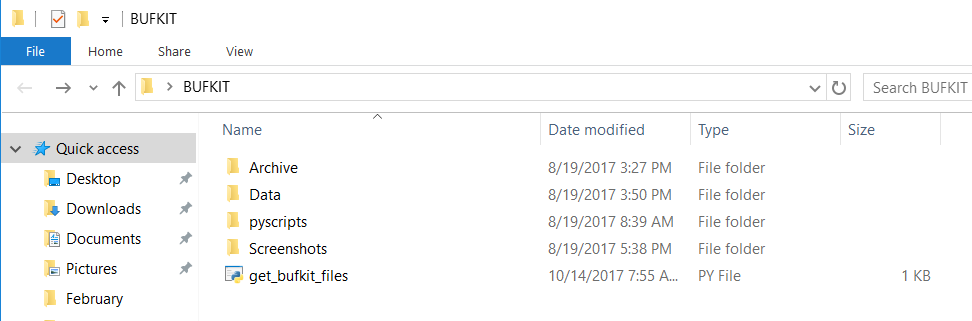
 Note: I am presuming you have already saved the script. I recommend you save it in your BUFKIT folder (as shown to the left - I have my scripts saved under "pyscripts". You do not have to make a separate folder like I did).
To run the script:
1. Open up Command Prompt
2. Navigate to where the python script is located by typing in 'cd Desktop' and hitting enter.
3. Now type 'cd BUFKIT' and hit enter.
4. Then type 'python get_bufkit_files.py', with 'get_bufkit_files' being whatever you named the script.
The script should run if you did everything properly. However, you may run into a few issues because you are dealing with code.
Here are some issues you may be running into:
Questions? Comments? Tweet/DM me: @WxBDM. Or shoot me an email.
Updates:
3rd line from bottom:
with urllib.request.urlopen(url) as response, open('hrrr_' + stations[i] + '.buf', 'wb') as out_file:
RAP:
Same as the HRRR.
09z: 'ftp://ftp.meteo.psu.edu/pub/bufkit/RAP/09/rap_' + stations[i] + '.buf'
10z: 'ftp://ftp.meteo.psu.edu/pub/bufkit/RAP/10/rap_' + stations[i] + '.buf'
11z: 'ftp://ftp.meteo.psu.edu/pub/bufkit/RAP/11/rap_' + stations[i] + '.buf'
...
3rd line from bottom:
3rd line from bottom:
with urllib.request.urlopen(url) as response, open('rap_' + stations[i] + '.buf', 'wb') as out_file:
03z: 'ftp://ftp.meteo.psu.edu/pub/bufkit/SREF/03/sref_' + stations[i] + '.buz'
09z: 'ftp://ftp.meteo.psu.edu/pub/bufkit/SREF/09/sref_' + stations[i] + '.buz'
15z: 'ftp://ftp.meteo.psu.edu/pub/bufkit/SREF/15/sref_' + stations[i] + '.buz'
21z: 'ftp://ftp.meteo.psu.edu/pub/bufkit/SREF/21/sref_' + stations[i] + '.buz'
3rd line from bottom:
with urllib.request.urlopen(url) as response, open('sref_' + stations[i] + '.buf', 'wb') as out_file:
===============================
If you do NOT have a compiler, please read below to be able to execute the script.
 Note: I am presuming you have already saved the script. I recommend you save it in your BUFKIT folder (as shown to the left - I have my scripts saved under "pyscripts". You do not have to make a separate folder like I did).
To run the script:
1. Open up Command Prompt
2. Navigate to where the python script is located by typing in 'cd Desktop' and hitting enter.
3. Now type 'cd BUFKIT' and hit enter.
4. Then type 'python get_bufkit_files.py', with 'get_bufkit_files' being whatever you named the script.
The script should run if you did everything properly. However, you may run into a few issues because you are dealing with code.
Here are some issues you may be running into:
Questions? Comments? Tweet/DM me: @WxBDM. Or shoot me an email.
Updates:
- 8/19 - added NAMNEST, RAP, edited NAM sources and url in code.
- 9/11 - added in executable script blog post
- 10/14 - added in a way to execute the script using command prompt and notepad.